How to Use Panorama Templates
Harry Forsdick
September 18, 2004
I. Introduction
Table of Contents |
I have long been fascinated with panoramas, and recently, interactive panoramas. When we came back from Alaska, I discovered a wonderful web site by Don Bain that shows his collection of over 3000 interactive panoramas from his trips in the West Coast of the United States. After seeing those panoramas, I decided to acquire the additional equipment that would allow me to take panoramas with my Nikon D70 camera. I found a page that was devoted to exactly that topic: How to make panoramas with the Nikon D70. In addition, I discovered a wonderful package from Duckware which combines a panorama viewer with an overview map viewer which shows dynamically the area you are viewing. Several people have asked me how they can do the same thing as I have done, and thus, this document.
There are two aspects to panoramas: Taking and Presenting the panoramas. I won't cover Taking panoramas since there are many tools/tutorials to/about how to do this available on the web. Instead, I will concentrate on a subset of presentation techniques: the techniques I have used to present them on the web.
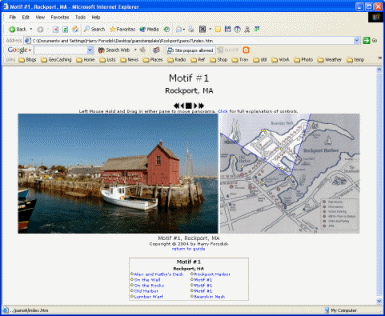
If you download this package (the Duckware PMVR package enhanced by javascript functions and a file structure that I developed) and follow these recipes, you will be able to see the following two types of displays:
|

By the way, this package consists of html, javascript, and text files, and so it will run on both PCs and Macs.
To see these in action, go to http://www.forsdick.com/pano/.
II. Presenting Panoramas on the Web
There are two components to the package:
-
The PMVR applets.
The most important component of this presentation technique is a set of Java Applets produced by Duckware referred to as PMVR. PMVR is shareware. You can try it for free. If you like it enough to keep using it, you must pay for this program. "Unregistered Version" will be displayed over panoramas until you purchase a license:
Order personal (non-commercial) license for $29.95 at www.duckware.com
You can try out my presentation template prior to purchasing the applets from Duckware. In addition to this documentation, you will also find the PMVR documentation to be useful as you figure out how to use this package.
- A file structure that you can copy to your computer to make your own panorama presentations. This file structure is designed for the situation where you divide your panoramas into multiple themes -- such as a location (Lexington, Rockport, etc.) or a type of activity (Hiking, Soccer, etc), with multiple panoramas in each theme.
Getting Started: OK. So how do you get started? Well, if you are a top-down kind of person, you may want to skip ahead to the Recipes section and just follow the step by step instructions. You will be referred back to detailed explanations. Alternatively, if you are a bottom-up fan, then read on.
First, you should download this package, which includes examples:
http://www.forsdick.com/pano/doc/howto/pano.zip
Unzip the package. I will assume that the top level directory is named "pano".
Next, you should download the trial version of the PMVR package from Duckware:
http://www.duckware.com/pmvr/index.html#download
When you unzip the Duckware package copy the 5 "CLASS" files into the top level "pano" directory.
The file structure is described below (red file names indicate files or directories you will have to change for your panoramas). After that I've included notes about all items you will have to change, keyed to the row number.
Row # |
Dir or File Name |
Description |
1 |
pano/ |
The start of things. In addition to the other directories, this directory includes the java applets (.class files) as well as the Guide page (index.htm) |
2 |
pano/doc/ |
All of the documentation about this package. You shouldn't need to change anything in this directory or its subdirectories. |
3 |
pano/doc/howto/ |
Files in this directory describe how to create these panorama pages (this page) and the ZIP file of the download. |
4 |
pano/doc/images/ |
Images used in documentation pages. |
5 |
pano/images/ |
Images that are used by the Guide page, the Documentation pages, as well as the Panorama pages. |
6 |
pano/images/backgrounds/ |
Background image patterns used in the Guide and Panorama pages |
7 |
pano/images/icons/ |
Icon images used in the Panorama pages |
8 |
pano/js/ |
Javascript files. There is currently only one file, buildpage.js which is used to generate parts of the Guide Page and all of the Panorama Pages. If you use this package as is, you shouldn't need to change anything in this directory. |
9 |
pano/Theme/ |
For each theme, this is the directory holding all files specifically related to that theme. The Theme notation means that the name of the theme should be used as the directory name. E.g., Rockport |
10 |
pano/Theme/images/ |
Files in this directory are used in common by the index.htm files in pano1, pano2, pano3, ... . In this case, all but one of the files are maps used as the overhead (plan) view in the panorama presentation. The exception is the theme.jpg image used to represent the theme on the Guide page. |
11 |
pano/Theme/pano1/ |
Directory holding files belonging to the first panorama. |
12 |
index.htm |
The html file that defines the first panorama's web page. |
13 |
pano-300.jpg |
The first panorama itself. |
14 |
pano.js |
A simple javascript file that lists various attributes of the first panorama. |
15 |
pano/Theme/pano2/ |
Directory holding files belonging to the second panorama. |
16 |
pano/Theme/.../ |
Directory holding files belonging to the ... panorama. |
17 |
pano/Theme/links.txt |
A text file that lists X, Y locations and widths and heights of spot on the overhead view and the file names of the panoramas (pano1, pano2, ..., panoN) which should be linked to those spots. |
18 |
pano/Theme/spots.txt |
A text file that lists X, Y locations and icons to be placed at those points on the overhead view and the file names of the panoramas (pano1, pano2, ..., panoN) which should be linked to those spots. |
19 |
pano/Theme/theme.js |
A simple javascript file that lists the Table of Contents title and directory for each of the panoramas in the theme. Note that this title is separate from and may be different than the title in the panorama's pano.js file. |
20 |
pano/theme/ |
This is a template for you to clone when creating a new theme. |
21 |
pano/guide.js |
A simple javascript file where you can customize the Guide page. |
22 |
pano/index.htm |
[Until I figure out how to fix an incompatability between Internet Explorer and Netscape Navigator, you will have to take the extra step of editing the pano/index.htm file] |
Notes (keyed to row number):
- pano/Theme The name of this directory should be the name of the theme for a collection of panoramas. To create a new theme, clone this directory and its subdirectories and then rename the top level directory with the name of the theme.
- pano/Theme/images
There are two types of images in this directory: overhead maps and a
single image which represents the theme on the guide page.
The overhead maps should have the same height as the panorama images and a reasonable landscape width. For example, here is a map that is 300 pixels high and 500 pixels wide: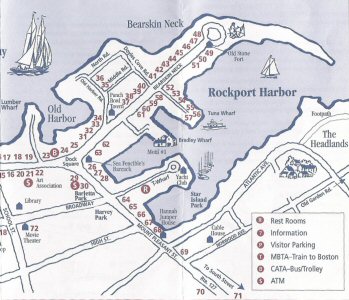
Overhead View (Plan View or Floor Plan)The theme.jpg image should be of similar dimensions as the image below:
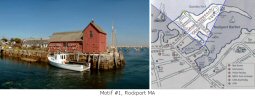
ThemeI waited until I had completed the panorama so that I could take a snapshot of one of the panoramas in the theme to represent the group.
- pano/Theme/pano1 For each panorama in a theme, there is a separate directory holding the files defining that panorama.
- pano/Theme/pano1/pano-300.jpg This is the panorama itself. You can use any program you want to produce the panorama. Panoramas do not need to be 360º panoramas -- smaller views can be displayed. Here is an example of a 360º panorama that has been scaled down to fit in this document. The full panorama is 300 pixels high (the same as the overhead map) by 2379 pixels wide.

Panorama
- pano/Theme/pano1/pano.js
This file defines the attributes
of the panorama. Although this is a javascript file, it is really quite
simple since it only defines a set of variables. green
attribute values indicate entries that you will probably want
to change to customize this file to be your own. The attributes are:
Attribute = Example Value;
DefinitionpanoTitle = 'Motif #1';
The title of this panorama. This appears at the top of the panorama page. panoSubtitle = 'Rockport, MA';
The subtitle... panoName = 'pano-300.jpg';
The name of the panorama image file. This usually resides in the same file as the pano.js file panoWidth = '500';
The width of the applet window used to display the panorama -- not the total width of the panorama image. panoHeight = '300';
The height ... panoCenter = '2427';
The column in the panorama which should be the initial position of the panorama, centered in the applet window. See PMVR documentation. which calls this attribute "center". pixDeg = '0=289,2378=289';
The angle in the overhead view of the first and last column of the panorama. See pixDeg documentation for help in figuring out what this should be. fpName = '../images/rockport7map-300.jpg';
This is the file name of the overhead view image (a.k.a. plan view or floor plan). Multiple panoramas in the same theme make use of the same overhead view and so this image is located in the theme directory rather than the panorama directory. It is also possible to have different overhead view images for set of panoramas in the same theme. The correspondence between this panorama's position on the overhead map and other panoramas is defined in the "links.txt' and "spots.txt" files described below. fpWidth = '349';
This is the width of the overhead view applet window. fpHeight = '300';
... height ... fpX = '175';
This is the X coordinate in the overhead image of the center of the pivot point of the panorama. fpY = '157';
... Y coordinate linksName = '../mck2.links.txt'; The contents of this file is:
175,157,4,../pano7/index.htm,Motif #1
113,47,4,../pano1/index.htm,Alex's Porch
110,44,4,../pano2/index.htm,On the Wall
105,72,4,../pano3/index.htm,On the Rocks
56,132,4,../pano4/index.htm,Old Harbor
34,108,4,../pano5/index.htm,Lumber Wharf
107,172,4,../pano6/index.htm,Rockport Harbor
152,136,4,../pano8/index.htm,Motif #1
155,139,4,../pano9/index.htm,Motif #1
153,88,4,../panoA/index.htm,Bearskin Neck
This file describes the other panoramas in the theme, including a rollover text label as well as the panorama identity. All of the yellow dots, except the one at the center of the sweep are the centers of other panoramas which are linked using the definitions in this file.

spotsName = '../mck2.spots.txt';

The contents of this file is:
175,157,../../images/icons/yellow.gif
113,47,../../images/icons/yellow.gif
110,42,../../images/icons/yellow.gif
105,41,../../images/icons/yellow.gif
56,132,../../images/icons/yellow.gif
34,108,../../images/icons/yellow.gif
107,172,../../images/icons/yellow.gif
152,136,../../images/icons/yellow.gif
155,139,../../images/icons/yellow.gif
153,88,../../images/icons/yellow.gif
This file describes the position of the icons used to visualize the links to other panoramas in the overhead view above. There is a one-to-one correspondence between the lines in this file with the lines in the links.txt file. In a single theme, there may be more than one overhead image, and thus more than one pair of links and spots files. In this particular example, there are two: mck and mck2. degreesView = '360';
This value defines the extent of the panorama in degrees.
- pano/Theme/pano2 The directory holding the files of the second panorama. There are as many pano files as there are panoramas in a given theme.
- pano/Theme/links.txt This is the file described under the linksName attribute above.
- pano/Theme/spots.txt This is the file described under the spotsName attribute above.
- pano/Theme/theme.js
This file defines the attributes
of a theme. This file is similar in format to the individual pano.js
files. Although this is a javascript file, it is really quite simple
since it only defines a set of variables. The attributes are:
Attribute = Example Value;
DefinitionthemeName = 'Rockport';
The name of the directory containing all of the files of the theme. themeBackground = '../../images/backgrounds/1bg.gif';
The background pattern for the Panorama pages of this theme. themeTitle = 'Rockport, MA';
The title of the theme. This string appears at the top of the table of contents block for each theme. These TOC blocks appear in two places: in the Guide page and also at the bottom of each Panorama page. themeSubtitle = '';
The subtitle... copyrightNotice = 'Copyright © 2004 by Harry Forsdick';
The copyright notice to appear below each panorama. returnLinkText = 'return to guide';
The text to appear below the panorama so that the viewer can return to the Guide page. returnLinkURL = '../../index.htm';
The location of the Guide page. var panoI = -1;
var panos = new Array;panos[++panoI] = ['Motif #1', 'pano7']; panos[++panoI] = ['Alex and Kathy's Porch', 'pano1']; ...
This portion of the themes.js file defines the list of panoramas that make up the theme. Each panorama is represented by a line with a title and the name of the directory where the panorama can be found. The title is used in the Table of Contents blocks that appear in the Guide page and the Panorama pages.
- pano/guide.js
This file defines the attributes
of the Guide page. This file is similar in format to the individual
theme.js and pano.js files. Although this is a javascript file, it is
really quite simple since it only defines a set of variables. The attributes
are:
Attribute = Example Value;
DefinitionguidePageTitle = 'Interactive Panoramas by ...';
The text that appears in the title bar of the browser when the Guide page is displayed. guideBackground = 'images/backgrounds/1bg.gif';
The background pattern for the Guide page guideTitle = 'Interactive Panoramas';
The first line of the title of the Guide page. guideSubtitle = 'Harry Forsdick';
The second line ... guideIntroduction =
'<p>I have long been fascinated ...';The introductory paragraph for the Guide page. You can include HTML markup if you want. guideNotice = 'Copyright © 2004 by Harry Forsdick'
The notice to appear at the bottom of the Guide page. var iTN = -1;
var guideThemeName = new Array;guideThemeName[++iTN] = 'Rockport'; guideThemeName[++iTN] = 'Lexington';
The list of theme names. If you want to add/remove themes, add/remove a complete line.
- pano/index.htm [Until
I figure out how to fix an incompatability between Internet Explorer
and Netscape Navigator, you will have to take the extra step of editing
the pano/index.htm file]. The initial contents of the pano/index.htm
file is:
pano/index.js
<html>
<head><script src=guide.js></script> <script src=js/buildpage.js></script> <script src=js/browserdetect.js></script>
<script>document.write('<title>' + guidePageTitle + '</title>')</script> <style type="text/css"> <!-- body, p, td { font-family: Verdana, Arial, Helvetica, sans-serif; font-size: 10pt; } --> </style> </head> <script> document.write('<body background="' + guideBackground + '" link="#0000FF" vlink="#0000FF" alink="#FF0000">'); </script> <div align="center"> <p><font size="+2"> <script> document.write(guideTitle) </script> <br> </font><font size="+1"> <script> document.write(guideSubtitle) </script> </font></p> <table width="625" border="0" align="center" cellpadding="0" cellspacing="0"> <tr> <td><script>document.write(guideIntroduction)</script></td> </tr> </table> <br> <table width="625" border="0" align="center" cellpadding="5" cellspacing="0"><script src="Rockport/theme.js"></script> <script> document.write(buildPanoDesc(themeName, themeTitle, themeSubtitle, panos)); </script><script src="Lexington/theme.js"></script> <script> document.write(buildPanoDesc(themeName, themeTitle, themeSubtitle, panos)); </script>
<script> // This is the code that should work between browsers, but doesn't // var s = ''; // for (i=0;i<guideThemeName.length;i++) // { // s += "<scr" + "ipt language=JavaScript src=" + // guideThemeName[i] + "/theme.js><\/scr"+"ipt>"; // s += "<scr" + "ipt language=JavaScript>"; // s += "document.write(buildPanoDesc(themeName, themeTitle, // themeSubtitle, panos));" // s += "<\/scr" + "ipt>"; // } // // document.write(s); </script></table>
<p><script>document.write(guideNotice)</script></p> </div> </body> </html>
To add another theme, add a copy of the two red <script> lines and change the string "Rockport" or "Lexington" with the name of your theme. To remove the Rockport or Lexington theme, remove the corresponding two <script> lines.
III. Recipes
Here are the steps I recommend for customizing this package so that it shows your panoramas. This sequence is ordered so that you can see your first Panorama page quickly, then add more Panorama pages to your theme and finally gather together your themes into a Guide page.
I will assume that you are using a Windows PC.
Getting to your first Panorama Page
- Installing Package: First, you should download this
package, which includes examples:
http://www.forsdick.com/pano/doc/howto/pano.zip
Unzip the package. I will assume that the top level directory is named "pano".
Next, you should download the trial version of the PMVR package from Duckware:
http://www.duckware.com/pmvr/index.html#download
When you unzip the Duckware package copy the 5 "CLASS" files into the top level "pano" directory.
- Name Theme: Decide the name of your theme. Place names are good. E.g., "eastpodunk".
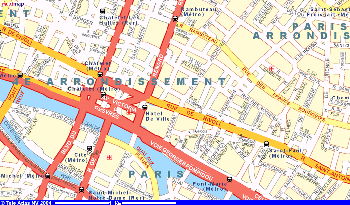
- Clone Theme Template Folder: In Windows Explorer, open up the pano folder, right click on the "theme" folder, and select the "copy" command. Now, right click in a blank space in the pano folder and select "paste". A new cloned copy named "Copy of theme" will be created. Now right click on "Copy of theme", select the "rename" command and type in the name of your theme. Let's say you name it "Paris"
- Define Your Theme: Using a text editor (e.g., notepad on PCs can be found in Start -> Applications -> Accessories -> Notepad) open up pano/Paris/theme.js. Make changes as needed, per instructions above.
- Defer Theme and Overhead View Images: For the time being, use the images already in the pano/Paris/images folder for you theme image and your overhead map. Once you have your panorama working we can come back and customize these two images.
- The Panorama: You should make a scales copy of your panorama that is a reasonable height so that it will allow you to show enough of the view to seem like you are looking out a bay window. I have found that if I scale my panoramas to be 300 pixels high that I can show them in a window that is 500 pixels wide and get a good effect. In any case, let's assume that you are using a 300 pixel high panorama. Copy this scaled panorama to the pano/Paris/pano1 folder and give it a name. The name doesn't matter, but let's assume it is pano-300.jpg.
- Define Your Panorama Page: Using a text editor open up pano/Paris/pano1/pano.js. Make changes as needed, per instructions above. You don't have to get all of the values right the first time. I have found that this is a very iterative process where you make tweaks here and there. Experiment with different values until you get the effect you like.
- Voilà: You have created your first Panorama page. Click on the file pano/Paris/pano1/index.htm. Don't feel bad if it doesn't work the first time. Use the examples (Rockport and Lexington) to understand how things work.
- Overhead View Image: Now go back and create the Overhead View image you deferred creating earlier. Use the ideas in the next section, Sources of Overhead Views, Plan Views or Floor Plans, for getting an Overhead View image. In any case, scale the Overhead View to the same height (e.g., 300 pixels) as your scaled panorama. Name this image something like map-300.jpg and make sure the variable fpName is set to this name. Here is an example of an Overhead view that measures 349x300.
- Theme Image: Once you have your panorama and overhead view linked up and working, grab a snapshot of your Panorama page. Trim the image and scale it so that it looks something like this (255x97):
Creating your Guide Page
- Define Your Guide Page: Using a text editor open up pano/guide.js. Make changes as needed, per instructions above.
- Unfortunately, there is an incompatibility between Microsoft IE and Netscape Mozilla and so you need to do one more thing until I figure out a way around the incompatibility: Open pano/index.htm in a text editor. Make changes as needed, per instructions above.
- Double Voilà: You have now created your first Guide page. Click on the file pano/index.htm to see it. If you have not removed the example themes, you should see three themes, including yours. You can remove the example themes by deleting the rows that describe them in pano/guide.js. You can also cleanup the extra Themes by deleting the "Rockport" and "Lexington" folders.
At this point, you have created a Theme, a Panorama page and a Guide page. The next steps are to create more panorama pages and possibly more Themes with their associated panoramas.
IV. Sources of Overhead Views, Plan Views or Floor Plans
I'm assuming that you have a source for pictures and the tools to make up your panoramas. The next issue is where do you find Overhead Views, Plan Views or Floor Plans. In essence, these are all maps with differing scales.
In general you should save these images into the folder pano/theme/images.
I have discovered as I've built my pages using this package that there are a couple of good sources for these kinds of images. But first, some hints:
- Quite often non-traditional maps are better than standard topo, road or aerial photo maps. By non-traditional, I mean schematic diagrams of an area that highlight the important details, leaving out a lot of the clutter.
- When you are hiking or touring, consider taking a photograph of sign or information boards containing maps about the area you are in.
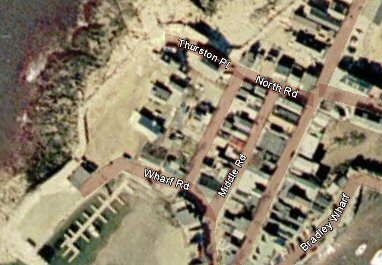
- Sometimes, a high resolution (e.g., 1meter) aerial photo is the best map. You can take a paint program to label the important points.
Now, on to the sources.
Brochures and Hardcopy Maps: If you are visiting a location, pick up all of the brochures that have maps of the area on which you are focusing, whether they be area maps, attraction maps, city maps, real estate floor plans, etc. When you get back home, use a scanner to scan this material and a paint program to scale the scanned material to the right size.
Google: The web is a good place to find these maps. Use Google to find these images. For a place named "Foo", use Google to search for:
Foo
Foo map
Foo floor plan
Foo overhead
You will usually find something that might be useful. If you are lucky, you can click on the "Images" link in Google and see an image that will work for you.
Use your browser to save the image to the pano/theme/images folder (typically right click and select the "Save Image As" or "Save Picture As" command).
Web Sites: There are many web sites that specialize in maps or aerial photographs. Some ore free, some you have to pay for.
Pay for Services
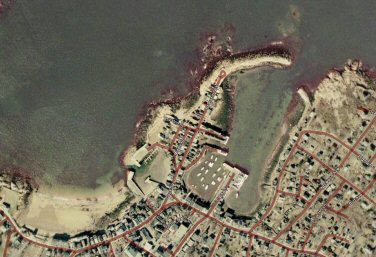
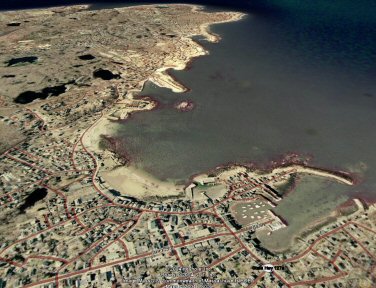
Keyhole: The best web site I have found for general aerial photographs with the ability to generate road overlays is:
This is an amazing service that (for a limited time) costs $40/year (regularly $70/year). Although all we are interested in is overhead aerial photos, this service is capable of a lot more. Examples of images that can be generated by Keyhole include the following:
Combo Color Aerial plus Roads
Larger Scale
Tilted Scene View
TopoFusion: Another really nice service is TopoFusion:
Although principally aimed at GPS users, it is an excellent system for generating maps, aerial photos and composites of maps and photos. It costs $40 which is one time fee. Examples of images that can be generated by TopoFusion include the following:
Topo Map
Aerial Photo
Combo Topo Map and Aerial Photo
Free Services
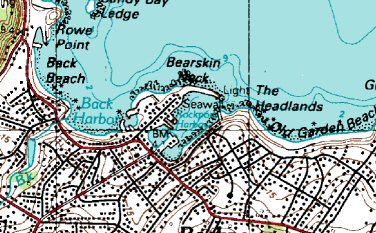
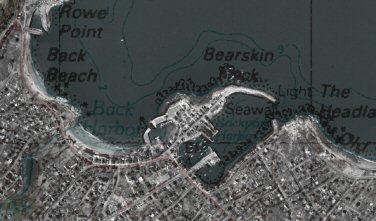
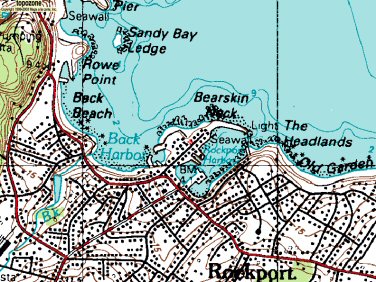
TopoZone: This service allows you to display topo maps of arbitrary areas in the USA.
Examples of images that can be generated by TopoZone include the following:
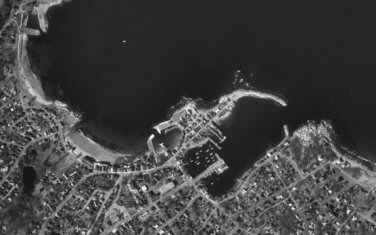
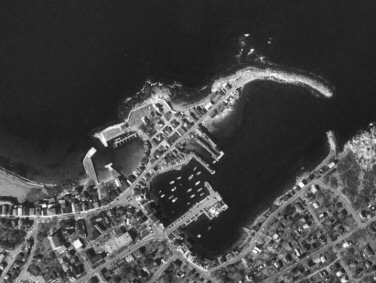
Topo MapTerraServer: This service, run by Microsoft, offers access to satellite photos down to 1meter resolution.
Examples of images that can be generated by TerraServer include the following:
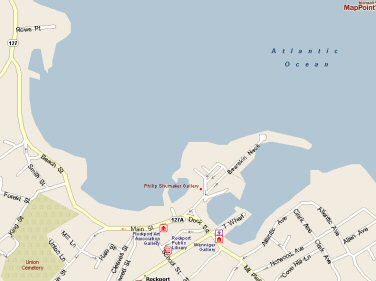
Aerial PhotoMapPoint: Microsoft also runs a map generating web site that is quite complete in it's coverage of the USA.
Examples of images that can be generated by MapPoint include the following:
Street MapMultiMap: Finally, for European maps, MultiMap is excellent.
Examples of images that can be generated by MultiMap include the following:
European Street Map
V. Directory Structure Listing
Below you will find a listing of the directories and files in the package.
Directory Structure
pano/ pano/doc/
controls.htm pano/howto/
index.htm
pano/howto/images/
controls.jpg
controls.ppt
directory.gif
keyhole1.jpg
keyhole2.jpg
keyhole3.jpg
mappoint1.jpg
multimap.gif
overheadview.jpg
panorama.gif
pspbrwse.jbf
terraserver1.jpg
top.gif
topofusion1.jpg
topofusion2.jpg
topofusion3.jpg
topozone1.jpg pano/images/ pano/images/backgrounds/
1bg.gif pano/images/icons/
blue.gif
red.gif
vcrback.gif
vcrover.gif
yellow.gif
yellowarrowd.jpg
yellowarrowl.jpg
yellowarrowll.jpg
yellowarrowlr.jpg
yellowarrowr.jpg
yellowarrowu.jpg
yellowarrowul.jpg
yellowarrowur.jpg
pano/js/
buildpage.js pano/Lexington/
links.txt
spots.txt
theme.js
pano/Lexington/images/
lexmap1.jpg
theme.jpg pano/Lexington/pano1/
index.htm
pano.js
pano-300.jpg
pano/Lexington/pano2/
index.htm
pano.js
pano-300.jpg ... pano/Rockport/
mck.links.txt
mck.spots.txt
mck2.links.txt
mck2.spots.txt
theme.js pano/Rockport/images/
rockport1map.jpg
rockport7map-300.jpg
theme.jpg pano/Rockport/pano1/
index.htm
pano.js
pano-300.jpg
pano/Rockport/pano2/
index.htm
pano.js
pano-300.jpg ... pano/software/
pmvr.zip |
VI. theme.js, pano.js, guide.js Listings
theme.js
themeName = 'Rockport'; copyrightNotice = 'Copyright © 2004 by Harry Forsdick'; returnLinkText = 'return to guide'; returnLinkURL = '../../index.htm'; var panoI = -1; var panos = new Array; panos[++panoI] = ['Motif #1', 'pano7']; panos[++panoI] = ['Alex and Kathy\'s Deck', 'pano1']; panos[++panoI] = ['On the Wall', 'pano2']; panos[++panoI] = ['On the Rocks', 'pano3']; panos[++panoI] = ['Old Harbor', 'pano4']; panos[++panoI] = ['Lumber Wharf', 'pano5']; panos[++panoI] = ['Rockport Harbor', 'pano6']; panos[++panoI] = ['Motif #1', 'pano8']; panos[++panoI] = ['Motif #1', 'pano9']; panos[++panoI] = ['Bearskin Neck', 'panoA']; |
pano.js
// pano.js -- settings that define a Panorama Page panoTitle = 'Alex and Kathy\'s Deck'; panoName = 'pano-300.jpg'; panoWidth = '500'; panoHeight = '300'; panoCenter = '345'; pixDeg = '0=265,2432=265'; fpName = '../images/rockport1map.jpg'; fpWidth = '397'; fpHeight = '300'; fpX = '184'; fpY = '215'; linksName = '../mck.links.txt'; spotsName = '../mck.spots.txt'; degreesView = '360'; |
guide.js
// guide.js -- settings that customize the Guide page guidePageTitle =
'Interactive Panoramas by Harry Forsdick';
guideBackground = 'images/backgrounds/1bg.gif'; guideTitle = 'Interactive Panoramas'; guideSubtitle = 'Harry Forsdick'; guideIntroduction =
'<p>I have long been fascinated with ...'
var iTN = -1;
guideThemeName = new Array;
guideThemeName[++iTN] = 'Rockport'; guideThemeName[++iTN] = 'Lexington'; guideNotice = 'Copyright © 2004 by Harry Forsdick'; |
![]()